
Hey there! As a supplier of Cold Heading Dies, I often get asked about the installation steps of these essential tools. In this blog post, I'll walk you through the process, sharing some tips and tricks along the way. So, let's dive right in!
Step 1: Preparation
Before you start installing the cold heading dies, it's crucial to make sure you have everything you need. First off, gather all the necessary tools. You'll typically need a set of wrenches, a torque wrench, and maybe a hammer for some minor adjustments. It's also a good idea to have a clean, well - lit workspace. Make sure the area is free from any debris or dirt that could potentially get into the dies and cause problems later on.
Inspect the dies thoroughly. Check for any signs of damage, such as cracks or chips. If you notice any issues, don't use the damaged dies. You can find high - quality Carbide Cold Heading Dies that are less likely to have these problems. Also, measure the dies to ensure they are the correct size for your cold heading machine.
Step 2: Cleaning the Machine
The next step is to clean the cold heading machine where the dies will be installed. Use a clean cloth and a suitable cleaning solvent to wipe down the die holders and all the contact surfaces. This will remove any old lubricants, dirt, or metal shavings. A clean surface is essential for a proper fit and good performance of the dies.
Pay special attention to the alignment pins and holes in the machine. These are crucial for ensuring that the dies are installed in the correct position. If these alignment features are dirty or damaged, it can lead to misalignment of the dies, which can cause uneven wear and poor quality parts.
Step 3: Installing the Lower Die
Now, it's time to install the lower die. Carefully place the lower die into the die holder. Make sure it fits snugly and aligns properly with the alignment pins or other positioning features in the holder. You may need to use a light tap with a hammer to seat the die correctly, but be very careful not to damage the die.
Once the lower die is in place, use the appropriate wrenches to tighten the clamping bolts. Don't over - tighten them right away. Just get them finger - tight first, and then use a torque wrench to tighten them to the recommended torque value. This will ensure that the lower die is held securely in place without being over - stressed.
Step 4: Installing the Upper Die
The upper die installation is a bit more delicate. First, check the upper die for any signs of damage or wear. Then, attach any necessary accessories, such as Carbide Cut Off Blade COB if your process requires it.
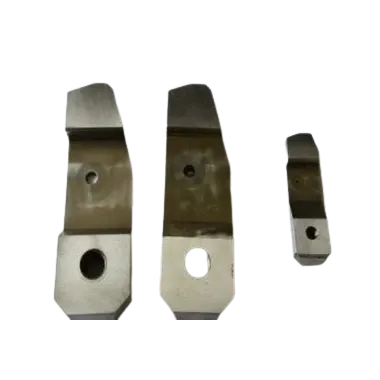
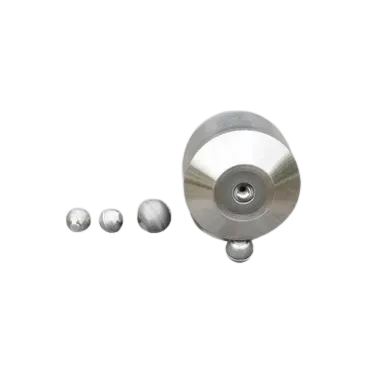
Carefully position the upper die above the lower die. Make sure it aligns perfectly with the lower die. This is where the alignment features in the machine really come in handy. Lower the upper die onto the lower die slowly and carefully. You may need to make some minor adjustments to get the perfect alignment.
Once the upper die is in position, install the clamping mechanism. This could be a set of bolts or a quick - change system, depending on your machine. Again, tighten the clamping parts gradually, following the recommended torque values.
Step 5: Adjusting the Die Clearance
After the dies are installed, you need to adjust the die clearance. The die clearance is the space between the upper and lower dies. This clearance is critical for the quality of the cold - headed parts. If the clearance is too small, it can cause excessive wear on the dies and may even lead to part breakage. If it's too large, the parts may not be formed correctly.
To adjust the clearance, you can use shims or make small adjustments to the machine's settings. Start by making small changes and then test the machine with a few trial runs. Check the parts produced for any signs of improper forming, such as burrs or uneven surfaces. Keep adjusting the clearance until you get the desired results.
Step 6: Lubrication
Lubrication is essential for the smooth operation of the cold heading dies. Apply a suitable lubricant to the dies and all the moving parts of the machine. The lubricant helps to reduce friction, which in turn reduces wear on the dies and improves the quality of the parts.
There are different types of lubricants available, and you should choose one that is suitable for your specific cold heading process. Make sure to follow the manufacturer's recommendations for lubricant application frequency and quantity.
Step 7: Testing the Installation
Once you've completed all the above steps, it's time to test the installation. Start the cold heading machine at a slow speed and run a few test cycles. Observe the operation of the machine and the quality of the parts being produced. Check for any abnormal noises, vibrations, or signs of misalignment.
If you notice any problems, stop the machine immediately and troubleshoot the issue. It could be a problem with the die installation, alignment, or lubrication. Make the necessary adjustments and then test the machine again until everything is working properly.
Step 8: Final Checks
After a successful test run, do a final check of the dies and the machine. Make sure all the bolts are still tight and that there are no signs of wear or damage that may have occurred during the test run. Check the lubricant levels and replenish if necessary.
Also, review the quality of the parts produced. If the parts meet your quality standards, then your die installation was successful. If not, you may need to make some further adjustments to the dies or the machine settings.
Why Choose Our Cold Heading Dies?
At our company, we offer a wide range of high - quality cold heading dies, including Quill COD. Our dies are made from top - grade materials and are manufactured to strict quality standards. This means you can expect longer die life, better part quality, and fewer production issues.
We understand that every cold heading process is unique, and we can work with you to find the right dies for your specific needs. Whether you're producing small, precision parts or large, heavy - duty components, we have the expertise and the products to help you succeed.
Contact Us for Your Cold Heading Die Needs
If you're in the market for cold heading dies or need more information about the installation process, don't hesitate to reach out. We're here to answer your questions, provide technical support, and help you find the best solutions for your cold heading operations. Contact us today to start a conversation about your procurement needs.
References
- Industry best practices for cold heading die installation.
- Manufacturer's manuals for cold heading machines and dies.