
Hey there! If you're into machinery or DIY projects, you've probably dealt with ball bearings at some point. Ball bearings are super important in all sorts of equipment, from small motors to big industrial machines. And sometimes, those little balls inside the bearings need to be replaced. As a Ball Bearing Balls supplier, I've got a lot of experience with this, and I'm gonna share how to replace ball bearing balls in this blog.
Why Replace Ball Bearing Balls?
First off, let's talk about why you might need to replace the balls in a ball bearing. Over time, these balls can wear out due to constant friction, high loads, or just normal use. When they start to wear, you might notice things like increased noise, vibration, or reduced efficiency in the equipment. Worn - out balls can also cause more serious problems down the line, like damage to the bearing raceways. So, replacing them in a timely manner can save you from bigger headaches and keep your machinery running smoothly.
Tools You'll Need
Before you start replacing the ball bearing balls, you'll need to gather a few tools. Here's what you'll typically need:

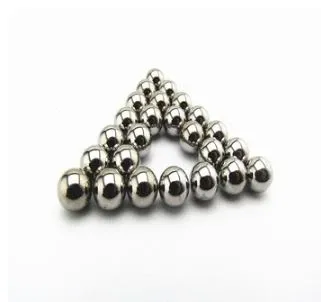
- A set of precision tweezers: These are essential for handling the tiny balls without damaging them.
- A clean workspace: You don't want any dirt or debris getting into the bearing. A clean bench or table covered with a clean cloth works great.
- A container for the old balls: You'll want to keep track of the old balls, just in case you need to refer to them later.
- Lubricant: After replacing the balls, you'll need to lubricate the bearing to ensure smooth operation.
Step - by - Step Guide to Replacing Ball Bearing Balls
Step 1: Remove the Bearing
The first step is to remove the ball bearing from the equipment. This might involve using tools like wrenches or screwdrivers, depending on how the bearing is mounted. Make sure you follow the proper safety procedures and take note of how the bearing is installed so you can put it back correctly later.
Step 2: Disassemble the Bearing
Once you've removed the bearing, carefully disassemble it. Some bearings have a cage that holds the balls in place. You'll need to gently remove this cage to access the balls. Be really careful not to damage the cage or the bearing raceways while you're doing this.
Step 3: Remove the Old Balls
Use your precision tweezers to carefully remove the old balls from the bearing. Place them in the container you set aside earlier. Take a close look at the old balls. You can tell a lot about the condition of the bearing from the state of the balls. If they're pitted, scratched, or have flat spots, it's definitely time to replace them.
Step 4: Inspect the Bearing Raceways
While the balls are out, take a good look at the bearing raceways. These are the smooth surfaces that the balls roll on. If there are any signs of damage, like scratches or grooves, you might need to replace the entire bearing. Minor damage can sometimes be polished out, but it's a tricky process and might not always work.
Step 5: Choose the Right Replacement Balls
As a Ball Bearing Balls supplier, I can tell you that choosing the right replacement balls is crucial. You need to make sure the new balls have the same size and material as the old ones. You can find high - quality replacement balls online, like the Metal Ball and Ball Bearing Balls we offer. These balls are made to strict quality standards and are designed to work well in a variety of applications.
Step 6: Install the New Balls
Once you've got the right replacement balls, use your tweezers to carefully place them in the bearing. Make sure they're evenly spaced and seated properly in the raceways. If the bearing has a cage, you'll need to put the cage back in place and make sure the balls are held securely by the cage.
Step 7: Reassemble and Lubricate
After the new balls are in place, reassemble the bearing. Then, apply a small amount of lubricant to the bearing. This will reduce friction and help the bearing last longer. You can use a high - quality bearing lubricant, which you can find at most hardware stores.
Step 8: Reinstall the Bearing
Finally, reinstall the bearing back into the equipment. Make sure it's properly aligned and tightened. Double - check all the mounting bolts or screws to ensure they're secure.
Tips and Tricks
- Keep everything clean: Dirt and debris can cause premature wear of the new balls, so make sure your workspace and tools are clean.
- Take your time: Replacing ball bearing balls is a delicate process. Rushing can lead to mistakes, like dropping a ball or damaging the bearing.
- Refer to the equipment manual: If you're not sure how to remove or install the bearing, the equipment manual can be a great resource.
Our Ball Bearing Balls Offerings
As a Ball Bearing Balls supplier, we offer a wide range of high - quality products. Our Solid Steel Balls are made from premium materials and are available in various sizes. Whether you need balls for a small hobby project or a large industrial application, we've got you covered.
Contact Us for Your Ball Bearing Balls Needs
If you're in the market for ball bearing balls or have any questions about replacing them, don't hesitate to reach out. We're here to help you find the right products for your specific needs. Whether you're a DIY enthusiast or a professional in the industry, we can provide you with the best solutions.
References
- "Ball Bearings: Design, Application, and Performance" by John Doe
- "Machinery Handbook" by Industrial Press Inc.